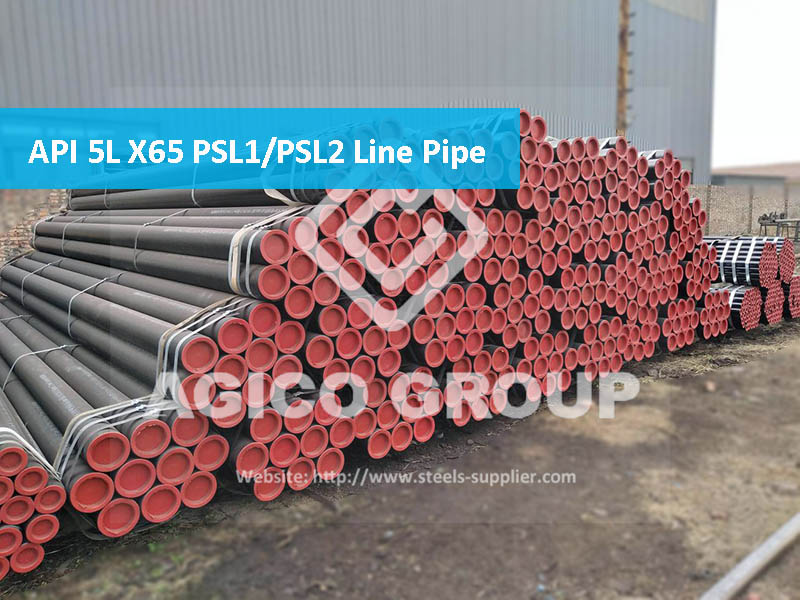
API 5L X65 Line Pipe Scope

The API 5L X65 line pipe is designed to be used as most economical and safe way of transporting oil and gas. The significant number of accidents caused by failures of pipelines is due to corrosion. Plastic deformation can modify the mechanical properties of these pipelines, steel's corrosive behavior when deformed plastically is important to avoid failures.
The Meaning of API 5L X65 Q PSL2 Grade:
- X The X symbol followed by a two or three digit number equal to the specified minimum yield strength in 1000 psi rounded down to the nearest integer.
- 65 Minimum Yield:At pipe body 450 MPa (65,300 psi)
- Q-Delivery condition: + N Normalizing rolling + Q Quenched and tempered;Q refers to a heat treatment process consisting of quench hardening followed by tempering
- Psl: PSL refers to the product specification level where PSL2 provides a more extensive chemical composition complete with a mandatory minimum fracture toughness.
Delivery condition for API 5L X65 Line Pipe
| PSL | Delivery Condition | Pipe grade |
|---|---|---|
| PSL1 | As-rolled, normalizing rolled, thermomechanical rolled, thermo-mechanical formed, normalizing formed, normalized, normalized and tempered | X42, X46, X52, X56, X60, X65, X70 |
| PSL 2 | Quenched and tempered | BQ, X42Q, X46Q, X56Q, X60Q, X65Q, X70Q, X80Q, X90Q, X100Q |
| Thermomechanical rolled or thermomechanical formed | BM, X42M, X46M, X56M, X60M, X65M, X70M, X80M |
Chemical Composition for API 5L X65 PSL 1 pipe with t ≤ 0.984”
| Steel Grade | Mass fraction, % based on heat and product analyses a,g | ||||||
|---|---|---|---|---|---|---|---|
| C | Mn | P | S | V | Nb | Ti | |
| max b | max b | max | max | max | max | max | |
| Seamless Pipe | |||||||
| X65 | 0.28 e | 1.40 e | 0.3 | 0.3 | f | f | f |
| Welded Pipe | |||||||
| X65 | 0.26 e | 1.45 e | 0.3 | 0.3 | f | f | f |
| f. Unless otherwise agreed, NB + V = Ti ≤ 0.15%, | |||||||
Chemical Composition for API 5L X65 PSL 2 pipe with t ≤ 0.984”
| Steel Grade | Mass fraction, % based on heat and product analyses | Carbon Equiv a | |||||||||||||||||||
|---|---|---|---|---|---|---|---|---|---|---|---|---|---|---|---|---|---|---|---|---|---|
| C | Si | Mn | P | S | V | Nb | Ti | Other | CE IIW | CE Pcm | |||||||||||
| max b | max | max b | max | max | max | max | max | max | max | ||||||||||||
| Seamless and Welded Pipe | |||||||||||||||||||||
| X65Q | 0.18f | 0.45f | 1.70f | 0.025 | 0.015 | g | g | g | h,l | 0.043 | 0.25 | ||||||||||
| Welded Pipe | |||||||||||||||||||||
| X65M | 0.12f | 0.45f | 1.60f | 0.025 | 0.015 | g | g | g | h,l | 0.043 | 0.25 | ||||||||||
|
h. Unless otherwise agreed, Cu ≤ 0.50% Ni ≤ 0.50% Cr ≤ 0.50% and MO ≤ 0.50%, l. For all PSL 2 pipe grades except those grades with footnotes j noted, the following applies. Unless otherwise agreed no intentional addition of B is permitted and residual B ≤ 0.001% . |
|||||||||||||||||||||
Mechanical properties for API 5L X65
| Pipe Grade | Tensile Properties – Pipe Body of SMLS and Welded Pipes PSL 1 | Seam of Welded Pipe | ||
|---|---|---|---|---|
| Yield Strength a | Tensile Strength a | Elongation | Tensile Strength b | |
| Rt0,5 PSI Min | Rm PSI Min | (in 2in Af % min) | Rm PSI Min | |
| X65 | 65,300 | 77,500 | c | 77,500 |
| c. The specified minimum elongation, Af, expressed in percent and rounded to the nearest percent, shall be determined using the following equation: | ||||
| Pipe Grade | Tensile Properties – Pipe Body of SMLS and Welded Pipes PSL 2 | Seam of Welded Pipe | |||||
|---|---|---|---|---|---|---|---|
| Yield Strength a | Tensile Strength a | Ratio a,c | Elongation | Tensile Strength d | |||
| Rt0,5 PSI Min | Rm PSI Min | R10,5IRm | (in 2in) | Rm (psi) | |||
| Af % | |||||||
| Minimum | Maximum | Minimum | Maximum | Maximum | Minimum | Minimum | |
| X65Q,X65M | 65,300 | 87,000 | 77,600 | 110,200 | 0.93 | f | 76,600 |
| f. The specified minimum elongation, Af, expressed in percent and rounded to the nearest percent, shall be determined using the following equation: | |||||||
Bend test
No cracks shall occur in any portion of the test piece and no opening of the weld shall occur.
Flattening test
Acceptance criteria for flattening test shall be:
- EW pipes D<12.750 in:
- X60 with T 500in. There shall be no opening of the weld before the distance between the plates is less than 66% of the original outside diameter. For all grades and wall, 50%.
- For pipe with a D/t > 10, there shall be no opening of the weld before the distance between the plates is less than 30% of the original outside diameter.
- For other sizes refer to the full API 5L specification.
CVN impact test for PSL2
Many PSL2 pipe sizes and grades require CVN. Seamless pipe is to be tested in the body. Welded pipe is to be tested in the body, pipe weld and heat-affected zone. Refer to the full API 5L specification for the chart of sizes and grades and required absorbed energy values.
Surface
- All surfaces have been 100% visually inspected. The surface condition complies with API 5L Annex E.
-
External surface of pipe shall be coated with a layer of varnish.
NDT
All pipes will be ultrasonic tested on pipe body and pipe end as per API 5L Annex E, Table E.2 and para E.3.3.
Coverage:
- longitudinal: 100% of the pipe surface
- pipe ends not scanned by automatic ultrasonic system shall be inspected by manual UT or Magnetic Particle Examination.
Hydrostatic test
- Test pressure may not exceed 2970 psi in accordance to API 5L requirements
- Holding time: minimum 5 seconds
Certification and traceability
All dimensions will be supplied with a 3.2 certificate according to EN 10204, endorsed by recognized and independent inspection agency. Marking shall be in SI units (X65) accordance with API requirements & mill standard.


